
Latest updates from the Dubsado team

Originally posted: January 2nd, 2019
We added a GREAT workflow addition today!
(insert happy dance) This is an exciting one. Now you can approve actions before they send to your clients. Approving before sending allows you to edit any items in that action before it sends. If all looks well you can approve it. If you don't approve right away, when it comes time for that action to trigger, you will receive an email alert reminding you to approve that action. There will also be a dashboard alert under the RECENT section letting you know which actions still need approval. You need to set it up in order for this to happen. Read below on how to do that!
To set up:
Approve before sending in a workflow is available on the following actions:
- send email
- send form
- send contract
- send primary invoice
- create invoice
- send appointment scheduler
When clicking into these actions, if you'd like to have approve before sending on, check the box!

How to approve actions:
You can approve actions as soon as you apply the workflow, even before it triggers so it can flawlessly send.

OR, if you choose to wait for that action to "trigger" you receive an email and dashboard alert reminder. It will NOT send until approve the action if you have that "approve before sending" on that action.
The dashboard alert:
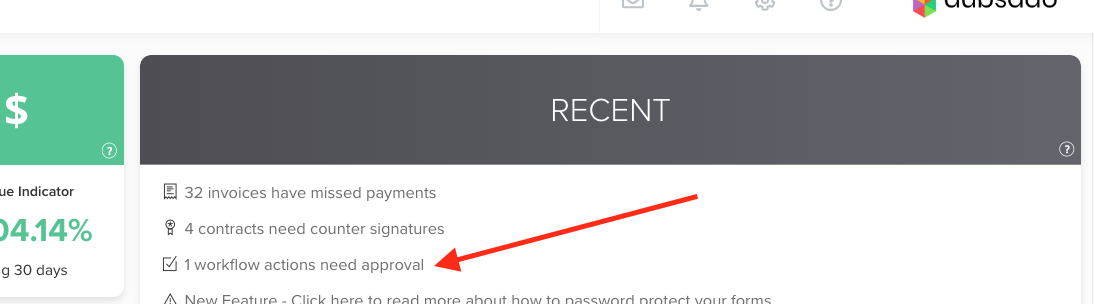
When you click through the dashboard alert, it brings you to a page with all the triggered pending posts.

When that action is triggered for approval, in addition to the dash alert, you get an email:

Super exciting. Let us know if you have any questions! :)
Originally posted: January 1st, 2019
We recently added the ability to map times in addition to the job dates on forms. This is completely separate to the scheduler and just a simple date question you add on the form. My mapping it to the job start or end date, it will have an option for the client to pick a time. It does not block that time out for others (use the scheduler if you want it to do that). So if you just needed a simple way to ask a client for a date and time and have it map, here you are!


If you wish for that date select to not show a time, change the mapping to just JOB DATE...

Originally posted: December 20th, 2018

We have added two workflow updates for you today. One action and one trigger.
We added the new action of archiving a project a certain point, most likely at the very end of a workflow since archiving a project pauses a workflow.
We will be adding conditional logic to more areas in workflows, but we are first starting with forms. With conditional form logic, you can now trigger an action to happen if a form has not been filled out. The form first needs to be added into your workflow in order for you to look at it and watch for it to not be completed. The form MUST be sent/triggered within that workflow to use conditional logic on it.
Originally posted: December 16th, 2018
Originally posted: December 11th, 2018
Two great updates for you today!
Originally posted: December 4th, 2018
You can now customize your auto email templates for the when the client books an appointment with you, when they cancel, and when they reschedule. Reminder: These 3 canned emails are sent automatically and there is nothing that you need to do to send them.
To customize, head to TEMPLATES >> CANNED EMAILS >> EDIT TEMPLATES

Within those canned emails there are the correct smart fields for populating the appointment information.

Originally posted: December 3rd, 2018
Another little update to our Scheduler. We have added smart fields for the Reschedule and Cancel buttons. These are for the use of creating canned emails and adding them in the Scheduler as the reminders. Before the reminders did not have these options...so add them in now if you would like your client to be able to either of these on the reminder emails.

Hope you enjoy this update! :)
Originally posted: December 2nd, 2018
.gif)
With this update, your brand settings color ( SETTINGS >> BRANDING ) will reflect in your scheduler as well.
So, whatever color you choose here:

Will appear here:

Enjoy this little update! :)
Originally posted: November 29th, 2018
Little update to add project modal on the PROJECTS page. Just a nice refresh to that pop up.

Originally posted: November 28th, 2018
You now have the option to turn off or on the bullet points in the invoice. Before it was only bullet points when you press enter with no option to turn off. We are excited for this update to give you the flexibility there.

With the bullet point option turned on, every time you ENTER, it will add a bullet point. This will not show in edit mode but it will be there upon adding the item to the invoice.

To have it without bullet points, just be sure that toggle is off and when you click enter, it will just add a space :)
